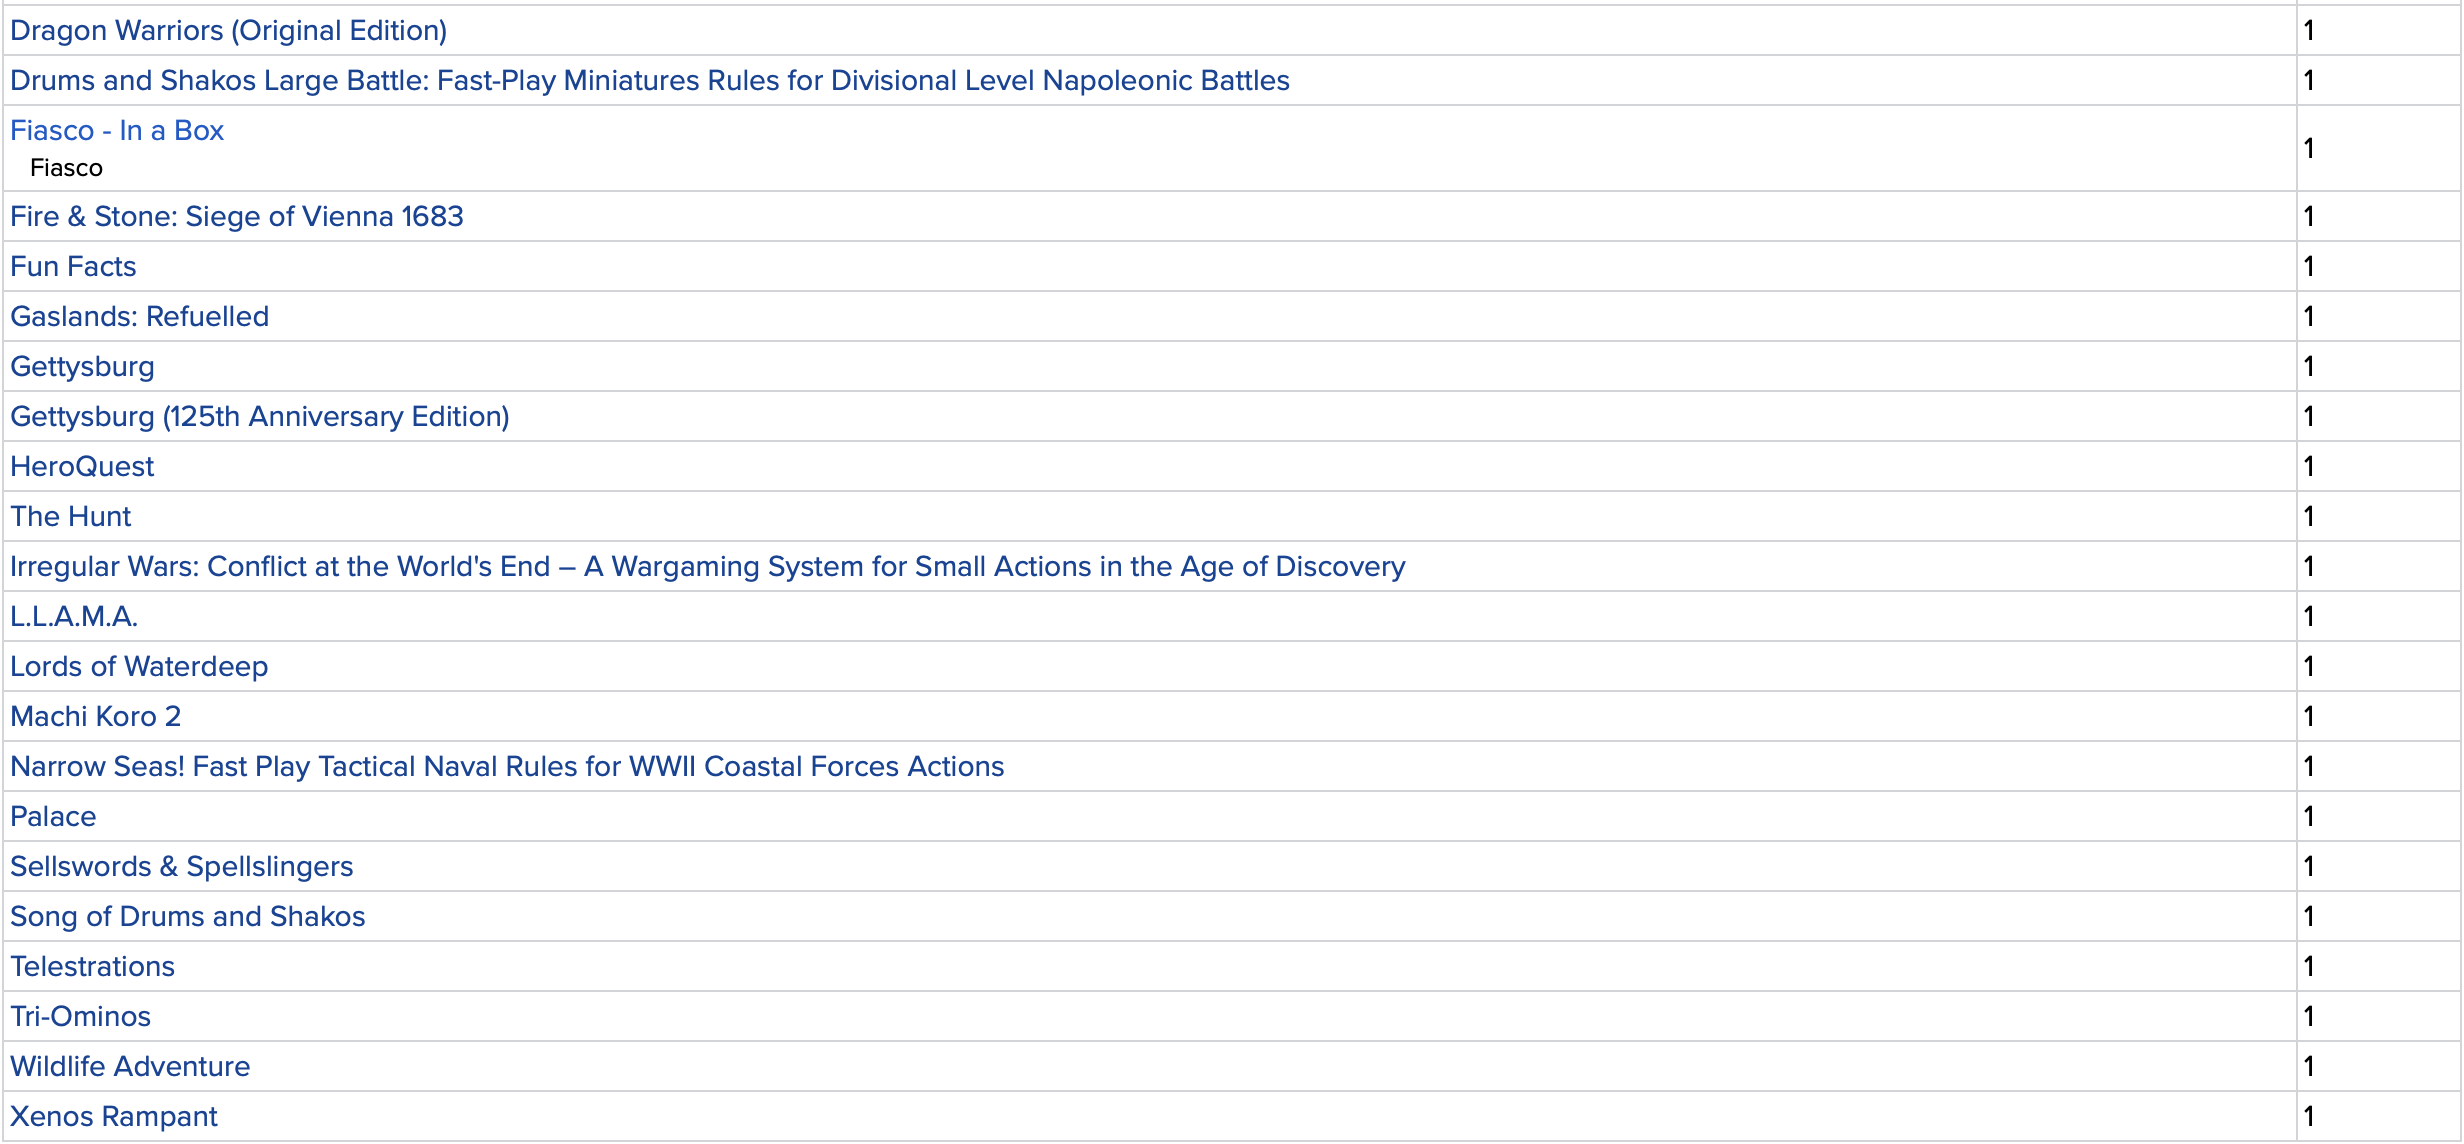
Another year ended, another end of the year report. The first thing that comes to mind is that I didn’t blog as much as I would have liked, but this is about my gaming year, not my blogging year. So what have I played? Let’s have a look at the Boardgamegeek statistic.

Top of the list is Traveller with 21 plays. The remote RPG group has become a real mainstay of my gaming. We meet pretty regularly, which means that we could finish the sci-fi campaign this year. We did a number of one-shots with other systems and will now start a new campaign, with Martin as GM running Call of Cthulhu. I’ve already made a character – a rare books dealer – and I’m very much looking forward to it! There was also a bit of face-to-face role-playing, most memorably Cthulhu Dark and Fiasco. I definitely want to try out more story-telling games in the vein of those two in 2024.

Miniature wargaming wise, this was definitely the year of What A Cowboy. The rules were released in April and I played my first game at the beginning of March. From then on, I played a number of single games with different people as well as two campaigns remotely with Stephan in Sweden and Martin. WaC was also the game of choice for our yearly summer event, which was one of the highlights of 2023. This time, we not only had guests from France (Manu brought this nephews), but also a spontaneous appearance by my nephew, which made me especially happy as I haven’t played with him for ages. The only downer was that Christoph was missing this year… hopefully, he will be back in 2024!
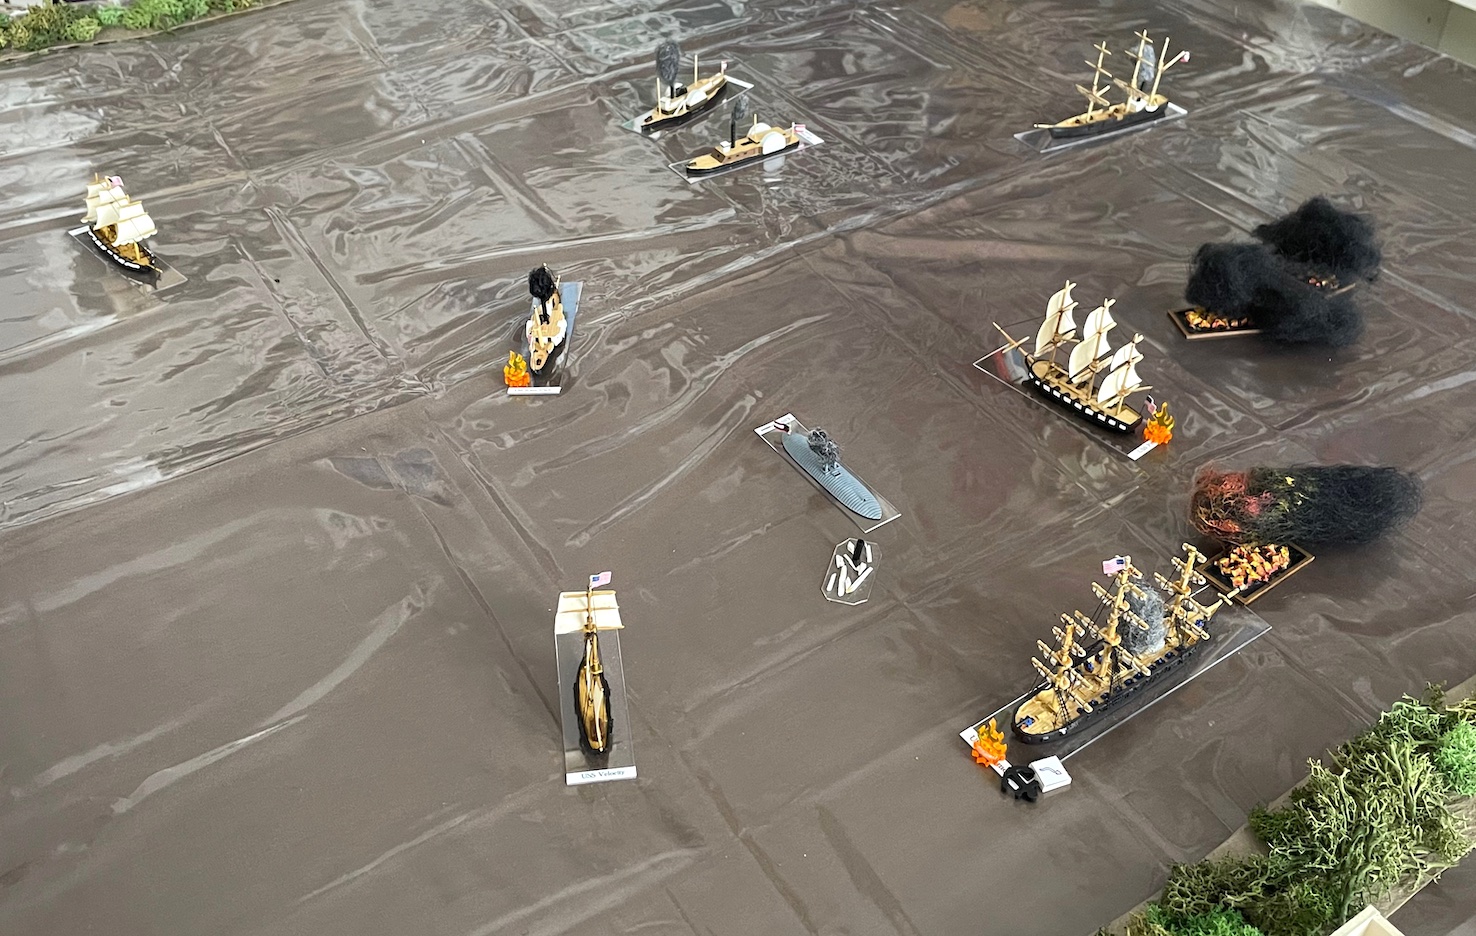
Among the top three on the BGG list, you will also spot a game with the unattractive name Unpublished Prototype. This is the BGG placeholder for games that are not yet published and therefore not in the database. In my case, it refers to my American Civil War naval rules. I’ve been thinking about those for a couple of years now and in summer, I suddenly got the urge to finally wrap them up. I did a lot of playtesting, but also printed, modeled and painted numerous ships. By October, the game felt like it was finally finished – feedback from different players was pretty good, I had most of the rules text and was playing around with the layout. Then, I was hit by a wave of self-doubt and began to dismantle everything I’ve designed and written so far, with the idea of starting anew from scratch. Fortunately, I realised what was happening and pulled the emergency brake in time. With the plan to take a step back and have a short break from the design process, I decided to occupy myself with something else for a time.
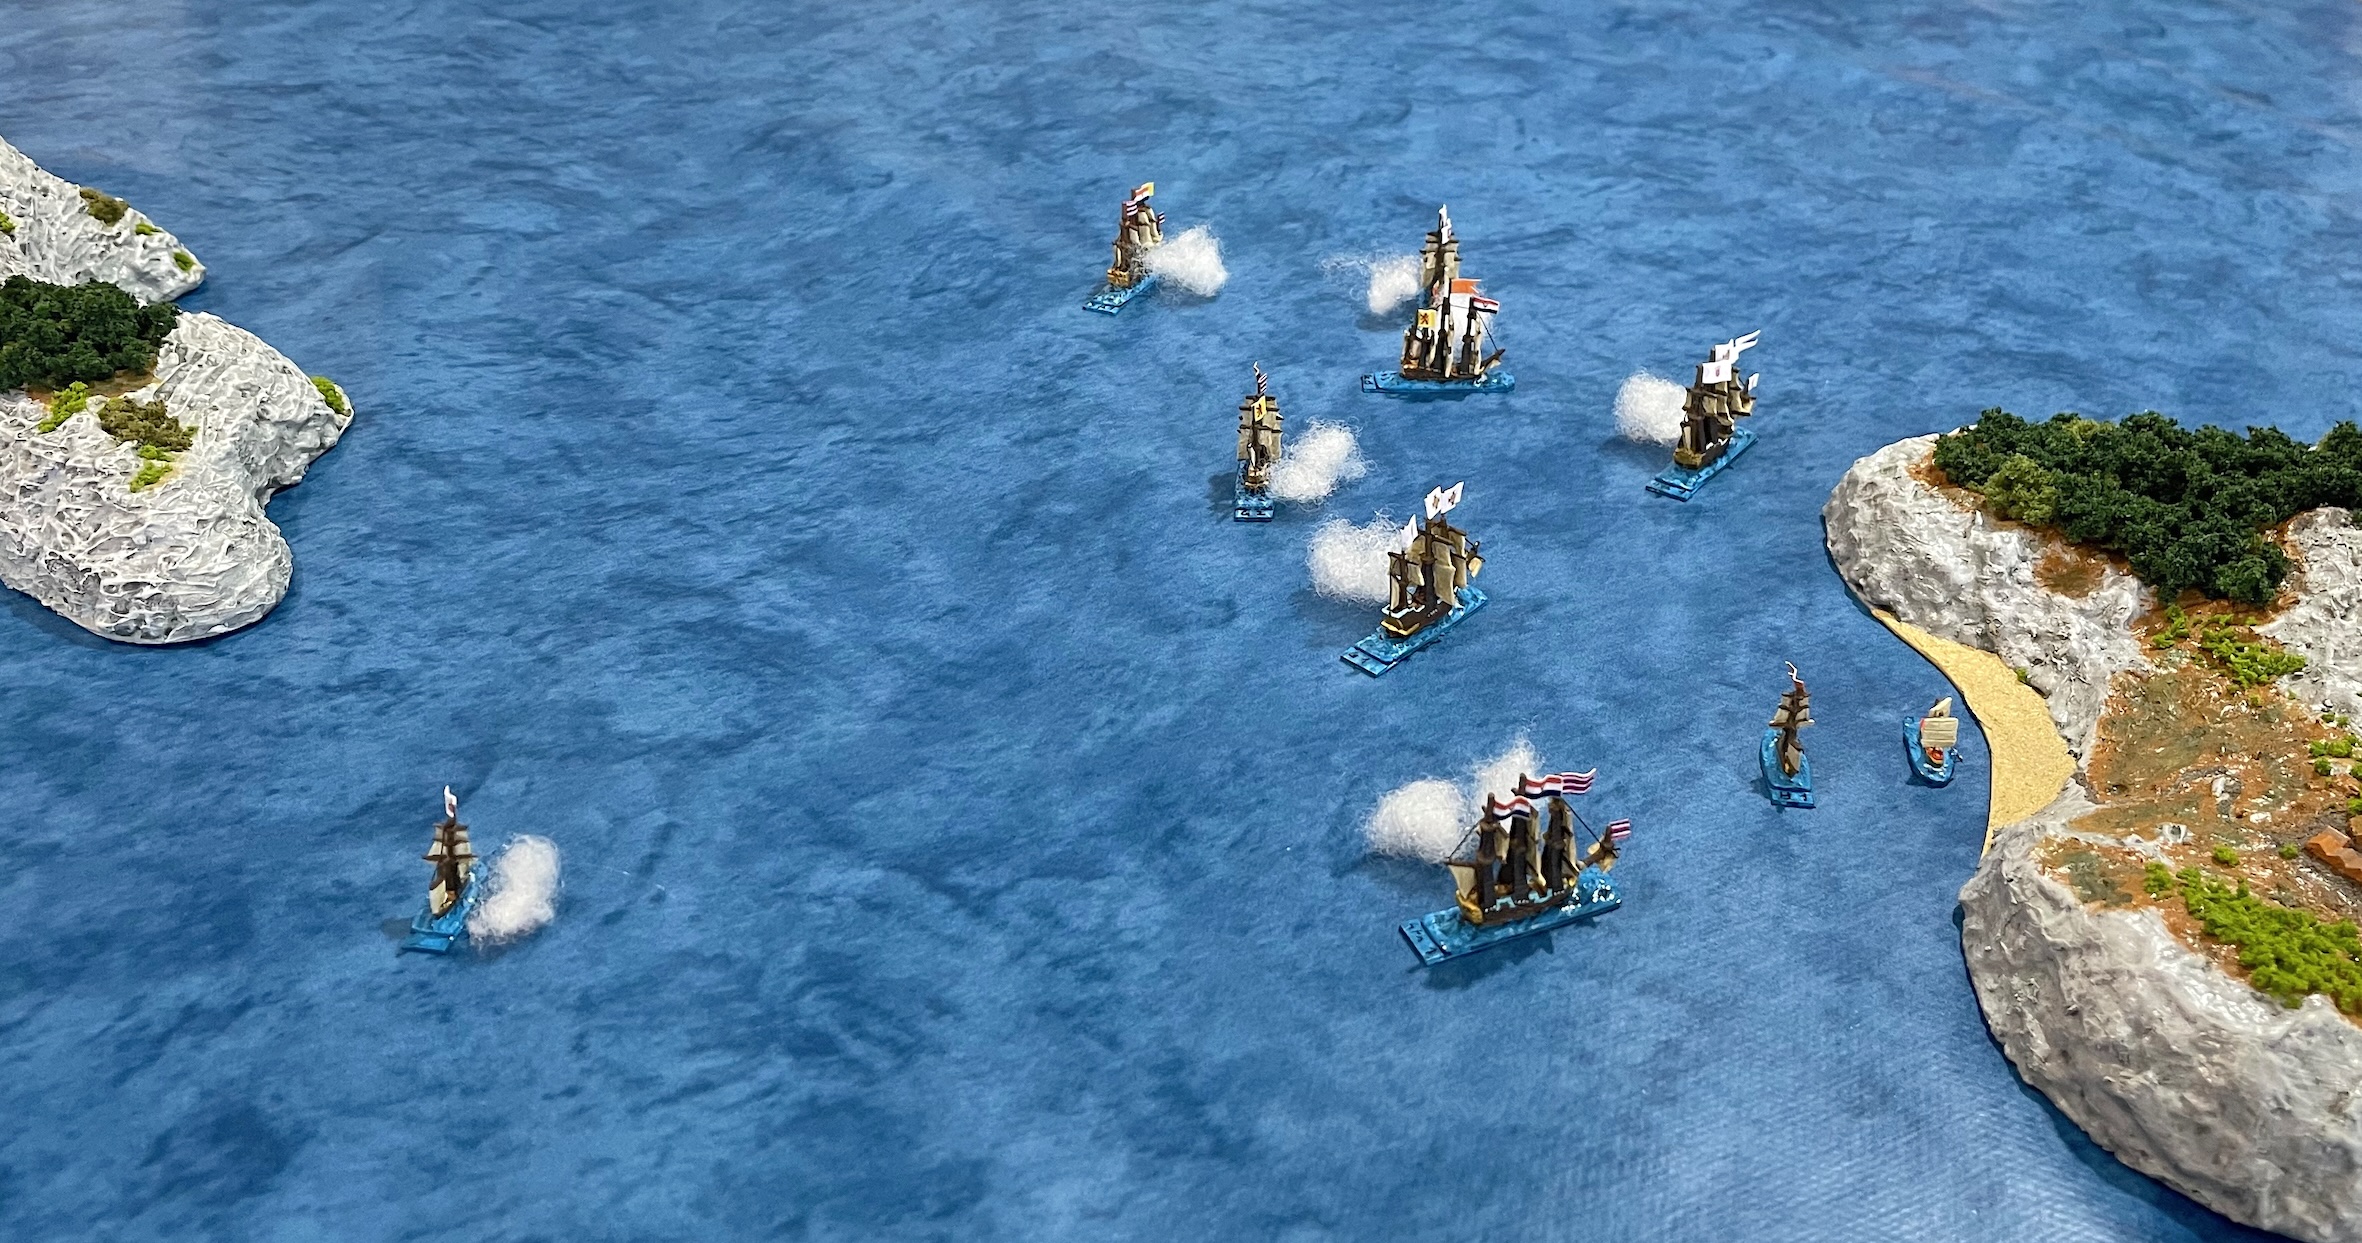
Along came Mad for War. I’ve been following Barry Hilton’s progress via Facebook for a while and always found it very inspiring, so I decided to take the plunge. The rulebooks really is gorgeous and the rules are fun. I painted a couple of 1/2400 ships from Tumbling Dice, which are lovely, and started to read about the period. I got especially interested in the early colonial actions involving ships from the Dutch East Indies Company in the early part of the 17th century. I also tinkered with David Manley’s Far Distant Ships, a great set of rules which I have adapted to the early 17th century by completely changing the command and control mechanics. Then I had the idea that a campaign with combined land operations would be fun, as I remembered my mate Sigur’s huge collection of 10mm 30 Years War figures – couldn’t they be used for the European troops? We played a test game of Irregular Wars, a set of rules specifically designed for small colonial battles in the 16th and 17th centuries, and I liked to so much that I placed an order with Pendraken for 10mm Indians to represent the small Sultanates of the various East Indian islands.

I also played a number of other miniatures wargames. Christoph ran 7TV Fantasy, which has some really interesting mechanics.

I did get in a couple of games of Sharp Practice at the beginning of the year, with the large birthday game covering the skirmish at Eferding in 1809 being another highlight of 2023. I also had a fun game of Song of Drums and Shakos with parts of Sigur’s splendid 28mm napoleonic collection (see his blog for an AAR) and also had another go at big battle napoleonics using my 6mm collection. This time, I tried Drums and Shakos Large Battle, but again it was not what I’m looking for.
Speaking of napoleonics, another of the year’s highlights was touring the battlefield of Wagram and visiting the local museum. This was not only a great day out, but also very insightful and something that I definitely want to do more often.
As always, I also played a rather eclectic range of boardgames. The highlights among them were Undaunted: North Africa, which I bought last year, and Gettysburg (125th Anniversary Edition), a very old game of which I finally found a well-priced second hand copy. It’s a hex and counter game, which I don’t normally like, but it has simple mechanics and a tidy look (no stacks!). Most important of all, it creates a dramatic narrative. In our game of the first day’s battle, with me playing the Union, Schurz’s division made a heroic stand defending the town of Gettysburg itself. If you know how much of a fan of the XI Corps and Schurz’s division specifically I am, you can imagine my delight!
Other noteable boardgames were Spirit Island, which is a favourite of my wife’s, revisiting Lords of Waterdeep, which is the most fun eurogame I know (and probably the only one I really like) and our perennial favourite Race for the Galaxy, for some inexcplicable reasons a game I win more often than not.
Oh, and a couple of days ago I had a game of Xenos Rampant, which rekindled my interest in sci-fi miniatures gaming. Maybe there will be more action for my 15mm sci-fi collection in 2024…

As always, I’m a bit surprised by the number of games I got in, especially considering that this year had a number of unpleasant events, including health issues and a (planned) hospital stay which knocked me out for a while. It is all the more gratifying to see the place gaming has in my life and I’m very grateful to all of my gaming partners for providing joy even if so-called real-life events sometimes make things difficult.
I don’t do plans, so there’s not much I can say about 2024. I’d like to keep up the gaming, as this is the most important thing about the hobby for me. Miniatures wise, I feel that I’m still not finished with naval stuff, so there’ll probably be more ships. After the Xenos Rampant game, I rummaged through my lead mountain and started to paint a couple of sci-fi vehicles. Hopefully, I’ll finish my ACW rules. A campaign combining 17th century naval and land actions would be cool. RPG wise, I’m lucky to have two thing to look forward to: Call of Cthulhu in our remote group and Warhammer Fantasy Roleplay, which Christoph wants to run next year. For boardgames, I’ll let myself be surprised what’s coming up. And as always, I’d like to blog more…
I hope you also had a good year. I wish all of you a Happy New Year and the best for 2024. Happy gaming!


