1809 Terrain 1 – Fields

My 15mm terrain collection is by now heavily geared towards the ACW. It will surprise no one that the landscape of Austria in the 1800s looked very different from the North American landscape around 1860. I did a quick research to find out how it differed from today’s Austrian landscape. Interestingly, it seems there were less hedgerows and less woods. Most of the land was of course used for agricultural purposes, the by far largest parts making up farmland. As three-field crop rotation was practiced, some fields would always lay fallow. Pastures were fewer, as livestock grazed on common land, where all the cattle of a village was driven by a herdsman in the morning and returned to their owners in the evening.

In contrast to Northern America, fields were not enclosed by fences. Fences were, however, used to enclose pastures and sometimes orchards.

The great birdseye map by Franz Xaver Schweickhardt, albeit drawn a bit later, offers a good glimpse at how the landscape looked at the time of the napoleonic wars (it’s accessible here)

This section shows the area around Parbasdorf, a village that was contested during the Battle of Wagram. The details are very neat and will be a great guide for setting up a gaming table.

So, from everything it is obvious that I need a lot of fields. I might even make a new mat with fields built in, but for the moment, I wanted to have something modular. I have some rather small ploughed fields from my medieval project, which I built out of corrugated cardboard. This time, I wanted to use cloth with acrylic paste so as to have somewhat flexible elements which can be used to recreate a more rolling landscape.

Now the 1809 campaign was fought during spring and summer, so most field would have standing crops. However, crops are rather difficult for wargaming purposes – you either have to make them removable, or you put the figures right on top of them, having them hover over the crops. I will use parts of a door mat for wheatfields, but for ease of play, most of my fields will only feature a hint of crops.

The basis for my fields was an old linen sheet. I drew the shapes with a marker, trying to make the fields modular and fit together in different ways.

I then mixed white sealing acrylic (because that’s what I had at hand) with acrylic paint and sand. Incidentally, on the acrylic cartridge it said it had expired in 2016, but I used it nonethless and had no problems. I applied the paste to the sheet with a spatula, then used a comb to create the furrows. I also sprinkled offcuts from the door mat on two fields so as to make it look like it had recently been harvested.

After cutting the fields out, I touched them up and dry brushed them. I also sparingly applied some static grass on the borders. Here’s my first attempt to create a landscape using the new fields (and some old ones):

They look ok, I guess. Because the linen sheet was thin and I also applied the acrylic thinner than I did before, the actually lie pretty flat on the table. They also accommodate better to a hilly landscape than I’d thought. All in all, I’m quite happy with them.

Building a Wizard’s Tower

One of the scenarios in the Sellswords & Spellslingers book demands a wizard’s tower. While there are several available to buy (from the plain Ziterdes keep to the formidable Tabletop World spire), I decided to scratch build my own.

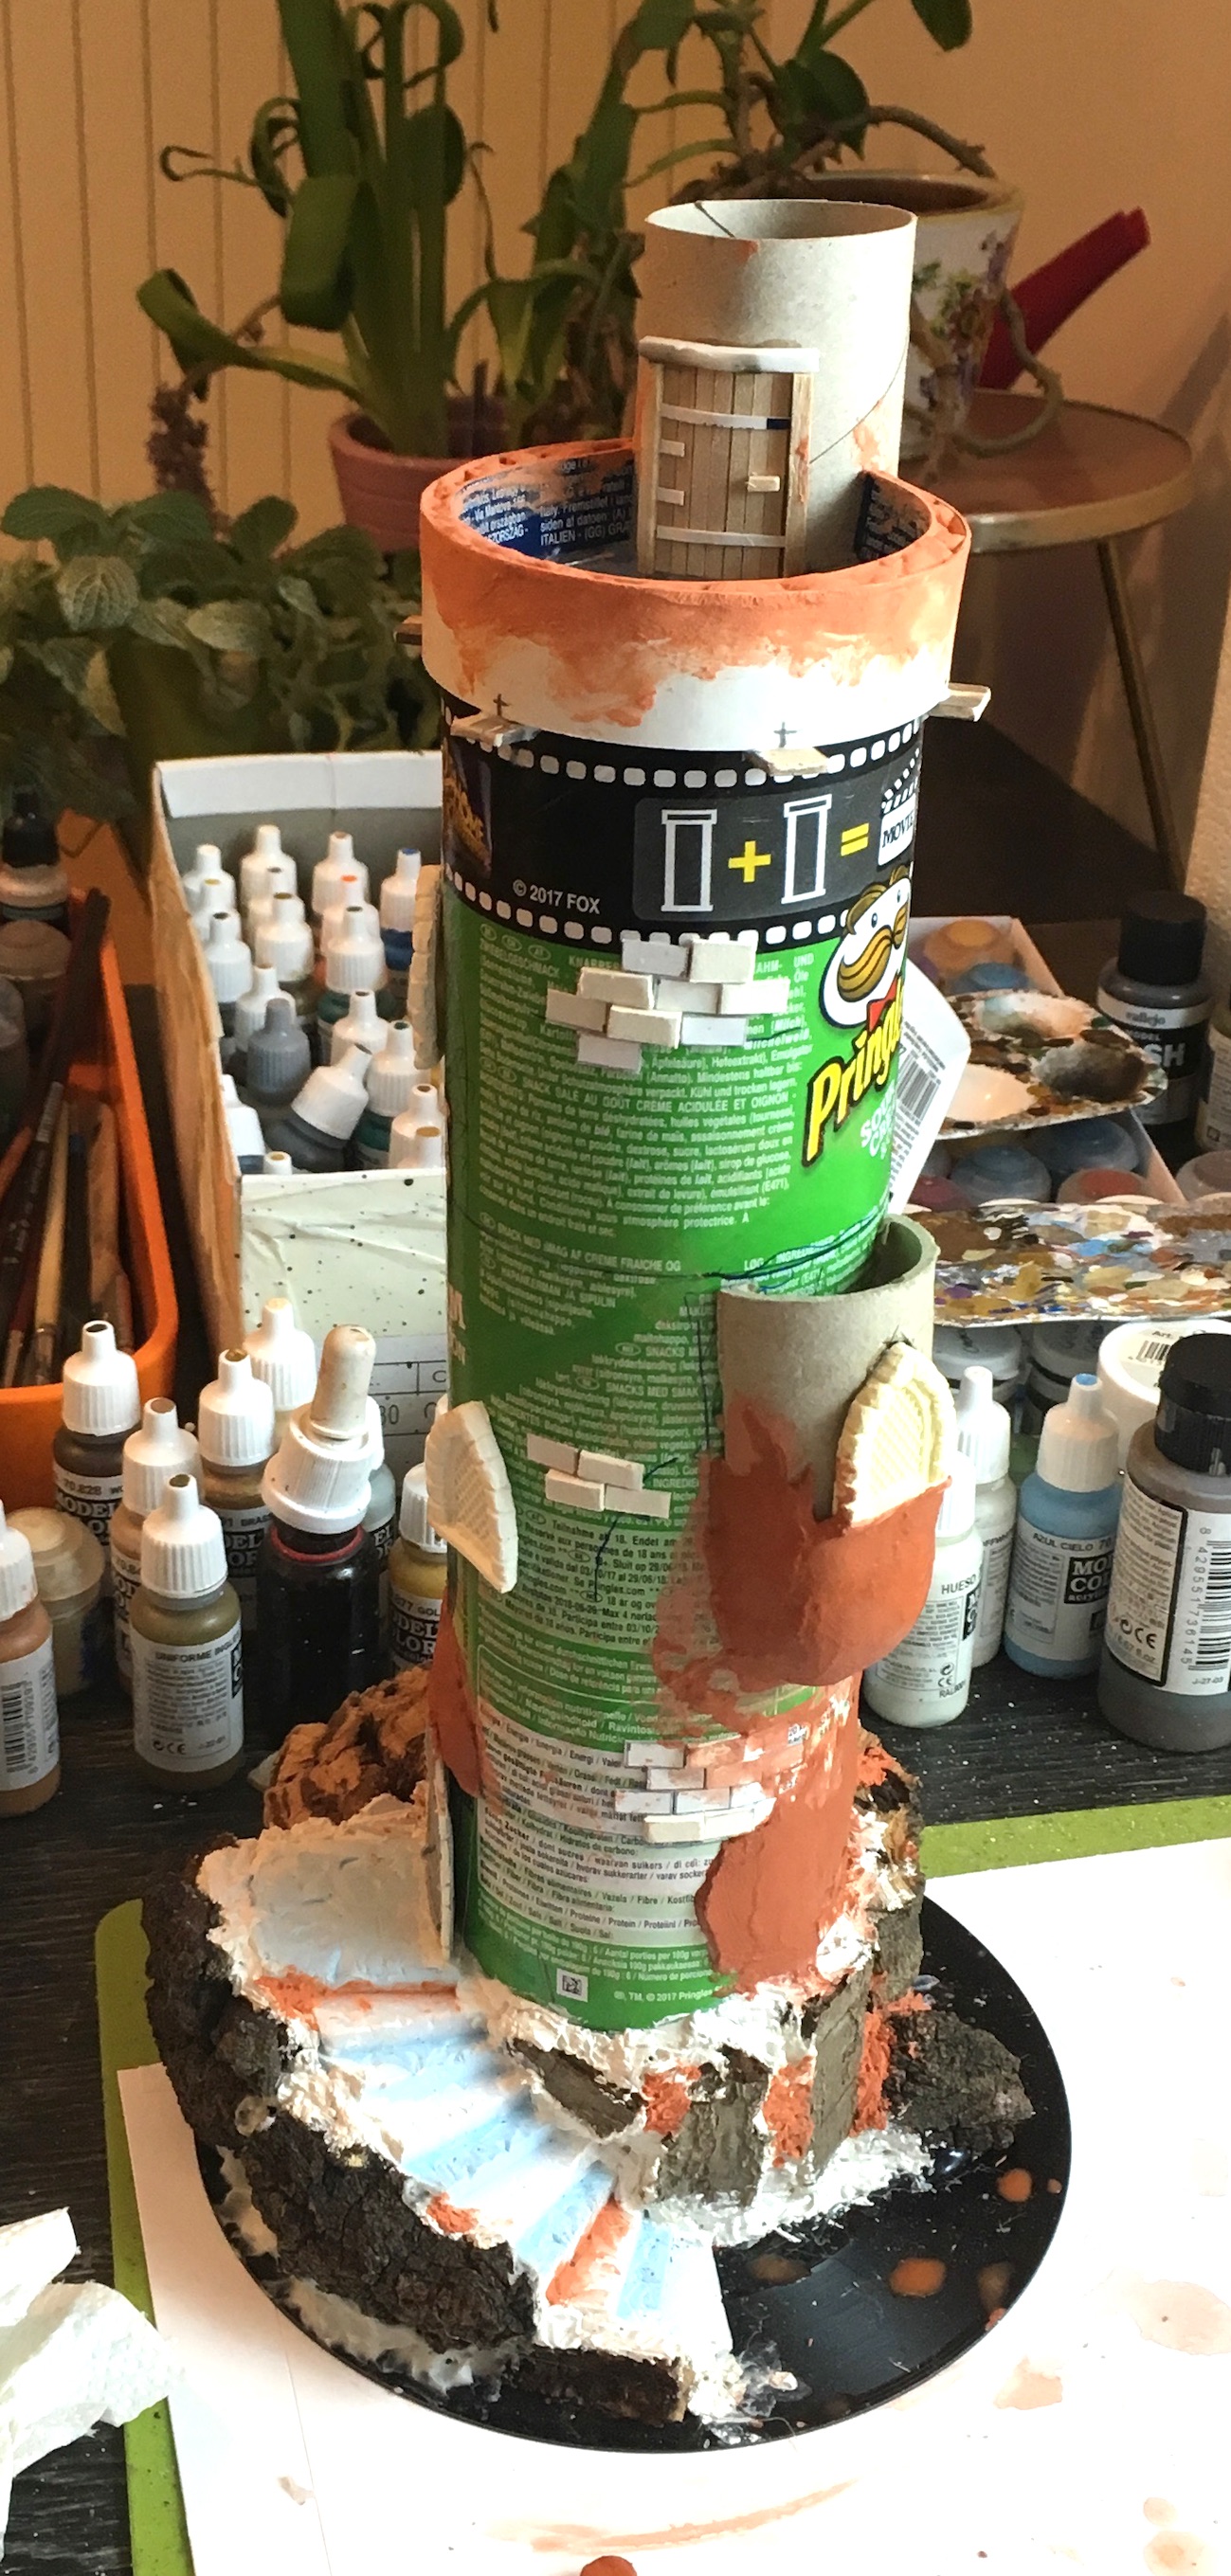
The starting point was a box of pringles. I glued it unto another cardboard roll to, as I wanted to have it protrude from a rocky outcrop. The basis was provided by an old single record.

wip1

For the rocky outcrop, I used blue foam and chunks of tree bark. The basis for a small secondary tower was formed by an empty toilet roll.

wip2

The next step was to fill the holes and cracks with modelling clay (of the air-drying kind) and filler. I also made adoor for the small tower was made out of wood and a parapet for the top platform.

wip3

I then added some details. First, cardboard brickwork to break up the surface of the tower. Second, an oriel made from yet another cardboard roll. Third, the door and windows. I bought those from Thomarillion, as I didn’t trust myself to scratch build nice enough ones. And last, I made protrusions beneath the parapet. They will later carry the Gargoyles, which I also ordered from Thomarillion.

wip5

I then started to cover the whole structure with DAS air-drying modelling clay, an idea I got from Tony Harwood, who regularly uses this technique with great success.

wip6

Before applying the modelling clay, I covered the surface with PVA glue, as the clay shrinks and may otherwise come off when dry. Looking good so far!

wip7

The roofs were made out of cardboard cones, with small bits of cardboard for the tiles. This is a boring and mind-numbing work, but fortunately I’m used to it from other project and those roofs were actually rather small in comparison to some others I’ve made. The base was covered with sand and grit and PVA glue.

wip9

Now there was only the painting to be done… and, after a couple of days, I had my final result – the wizard’s tower!

t2

How to… Make a Dice Tray

When playing miniature games, I don’t particularly like it when the dice are rolled all over the table. I like to think that I’m not too fussy when it comes to my figures and terrain (which is, of course, a self-deceit), but I wince when the dice bump against minis or crash into buildings.

Many people use dice towers, which have several advantages, one of them being that they take up a small footprint. However, I like rolling dice and I don’t see why a box should get to do all the fun stuff.

The solution is, of course, to use a dice tray. Fortunately, this is easily made.

For the tray, I got myself timber panels from the local art supply.

casani-holzkoerper-fuer-neue-bildformate-jh1m0gle_zoom

They come in different sizes, are sturdy but not very expensive and look neat. I then cut green felt in the correct size and glued it into the panel. Voilà! That was easy. I made a small one, 15x20cm, for RPGS and games like Sellswords & Spellslingers, where only a couple of dice are rolled. I also made a larger version, which is 20x30cm, for games like Sharp Practice, where you roll buckets of dice.

dicetrays

If you look closely you can see that, me being me, the felt is cut a bit wobbly and in the small tray, the glue came through the felt at some points. I used less glue for the larger tray, which worked better.

Virago also made himself such trays, but Virago being Virago, he of course cut everything straight. He used two-sided adhesive tape for glueing the felt into the box, which is an excellent idea.

Even better, he made a special dice tray for his Blood Angels:

40784961_469177403490741_8203510581878063104_n

He used red felt and then used a cutting plotter to make an airbrush mask for the logo. Very impressive work!

Making dice trays is easy and as Virago has shown, you can go to lengths to customize them for your favourite game or army.

Small Figures, Big Battles

As you might have noticed, I was quite taken with the 6mm Altar of Freedom game I saw at our Gettysburg Battle Day. I’m usually not interested in big battle games, but this one really impressed me. So naturally, I wanted to do something similar. At first I thought about buying 6mm figures, but I immediately broke sweat when I realised how many figures I would have to paint. However, it then struck me that I already have small figures – namely the Irregular Miniatures 2mm blocks I painted for Battle Cry!

It was easy to stick four of them to a thin cardboard base with Blue Tack. The great thing is that this actually looks like a brigade! 

Now those bases are a bit smaller than the base sizes recommended in the Altar of Freedom rulebook – by 1/3, to be exact. So I decided to reduce all distances by one-third (this is something I have done with so many rules now it’s become almost a reflex). The great advantage is that this also reduces the playing field, meaning I can play Gettysburg on a kitchen table while still keeping the ground scale of the rules.

I also bought one of the Altar of Freedom scenario books, namely the Western Theatre one. I soon realised that I still need loads of figures. There are, however, two battles I can play with what I have: Fort Donelson and Pea Ridge. I decided to use Fort Donelson as a field for experimentation and try out some ways to make terrain.

With small scales, terrain is actually more important than figures. Instead of making modular terrain, I decided to make a custom mat for this scenario only. As in this case the playing field is only 2’x2′, it was easy to get cheap artist’s canvas, which provided me with a convenient area to work on.

I started by copying the scenario map unto the canvas.

board1

As you can see, caulking acrylic was used to model the outer field works of the Fort. The whole thing was then painted, using a mixture of acrylic paint and sand for the surface of most of the board. The fieldworks were drybrushed with brown paint to suggest fresh earth, while the roads were done without texture. It is important to go easy on the texture, as 2mm figures really are small and the slightest bumps look like huge rock formations.

board2

For the village of Dover and the farm, I quickly made houses out of balsa woods and glued them on a base.

village1

I also wanted to have woods under which figures can be placed. Again, as the figures are much small than 6mm, the technique has to be adapted. Pieces of felt provided bases which were flocked with Woodland Scenics clump foliage. I glued thin pieces of sponge material (the stuff used to store figures in) on the underside to achieve a bit of height.

woods1

This is how the whole board looks:

board3board_detailboard_detail2

The whole process wasn’t too much work and it was actually quite fun to work in a completely different scale with completly different requirements. My aim was to achieve an almost map-like look, giving the impression of a birds-eye view unto the battlefield.

Shortly after I’ve finished, we managed to play our first game. We both like the rules a lot – the Command & Control mechanics are great and the games moves along at a brisk pace.

Coming from skirmish gaming, it’s interesting how different the game feels – it really feels like you are an army commander ordering divisions around.

I’ve already ordered reinforcements from Irregular Miniatures and will definitely continue with this project!