Some time ago, when reading old issues of Miniature Wargames, I came across the articles on terrain building by Ian Weekley. The windmill especially caught my eye and I made the firm resolve to build one myself. Well, I finally did it!
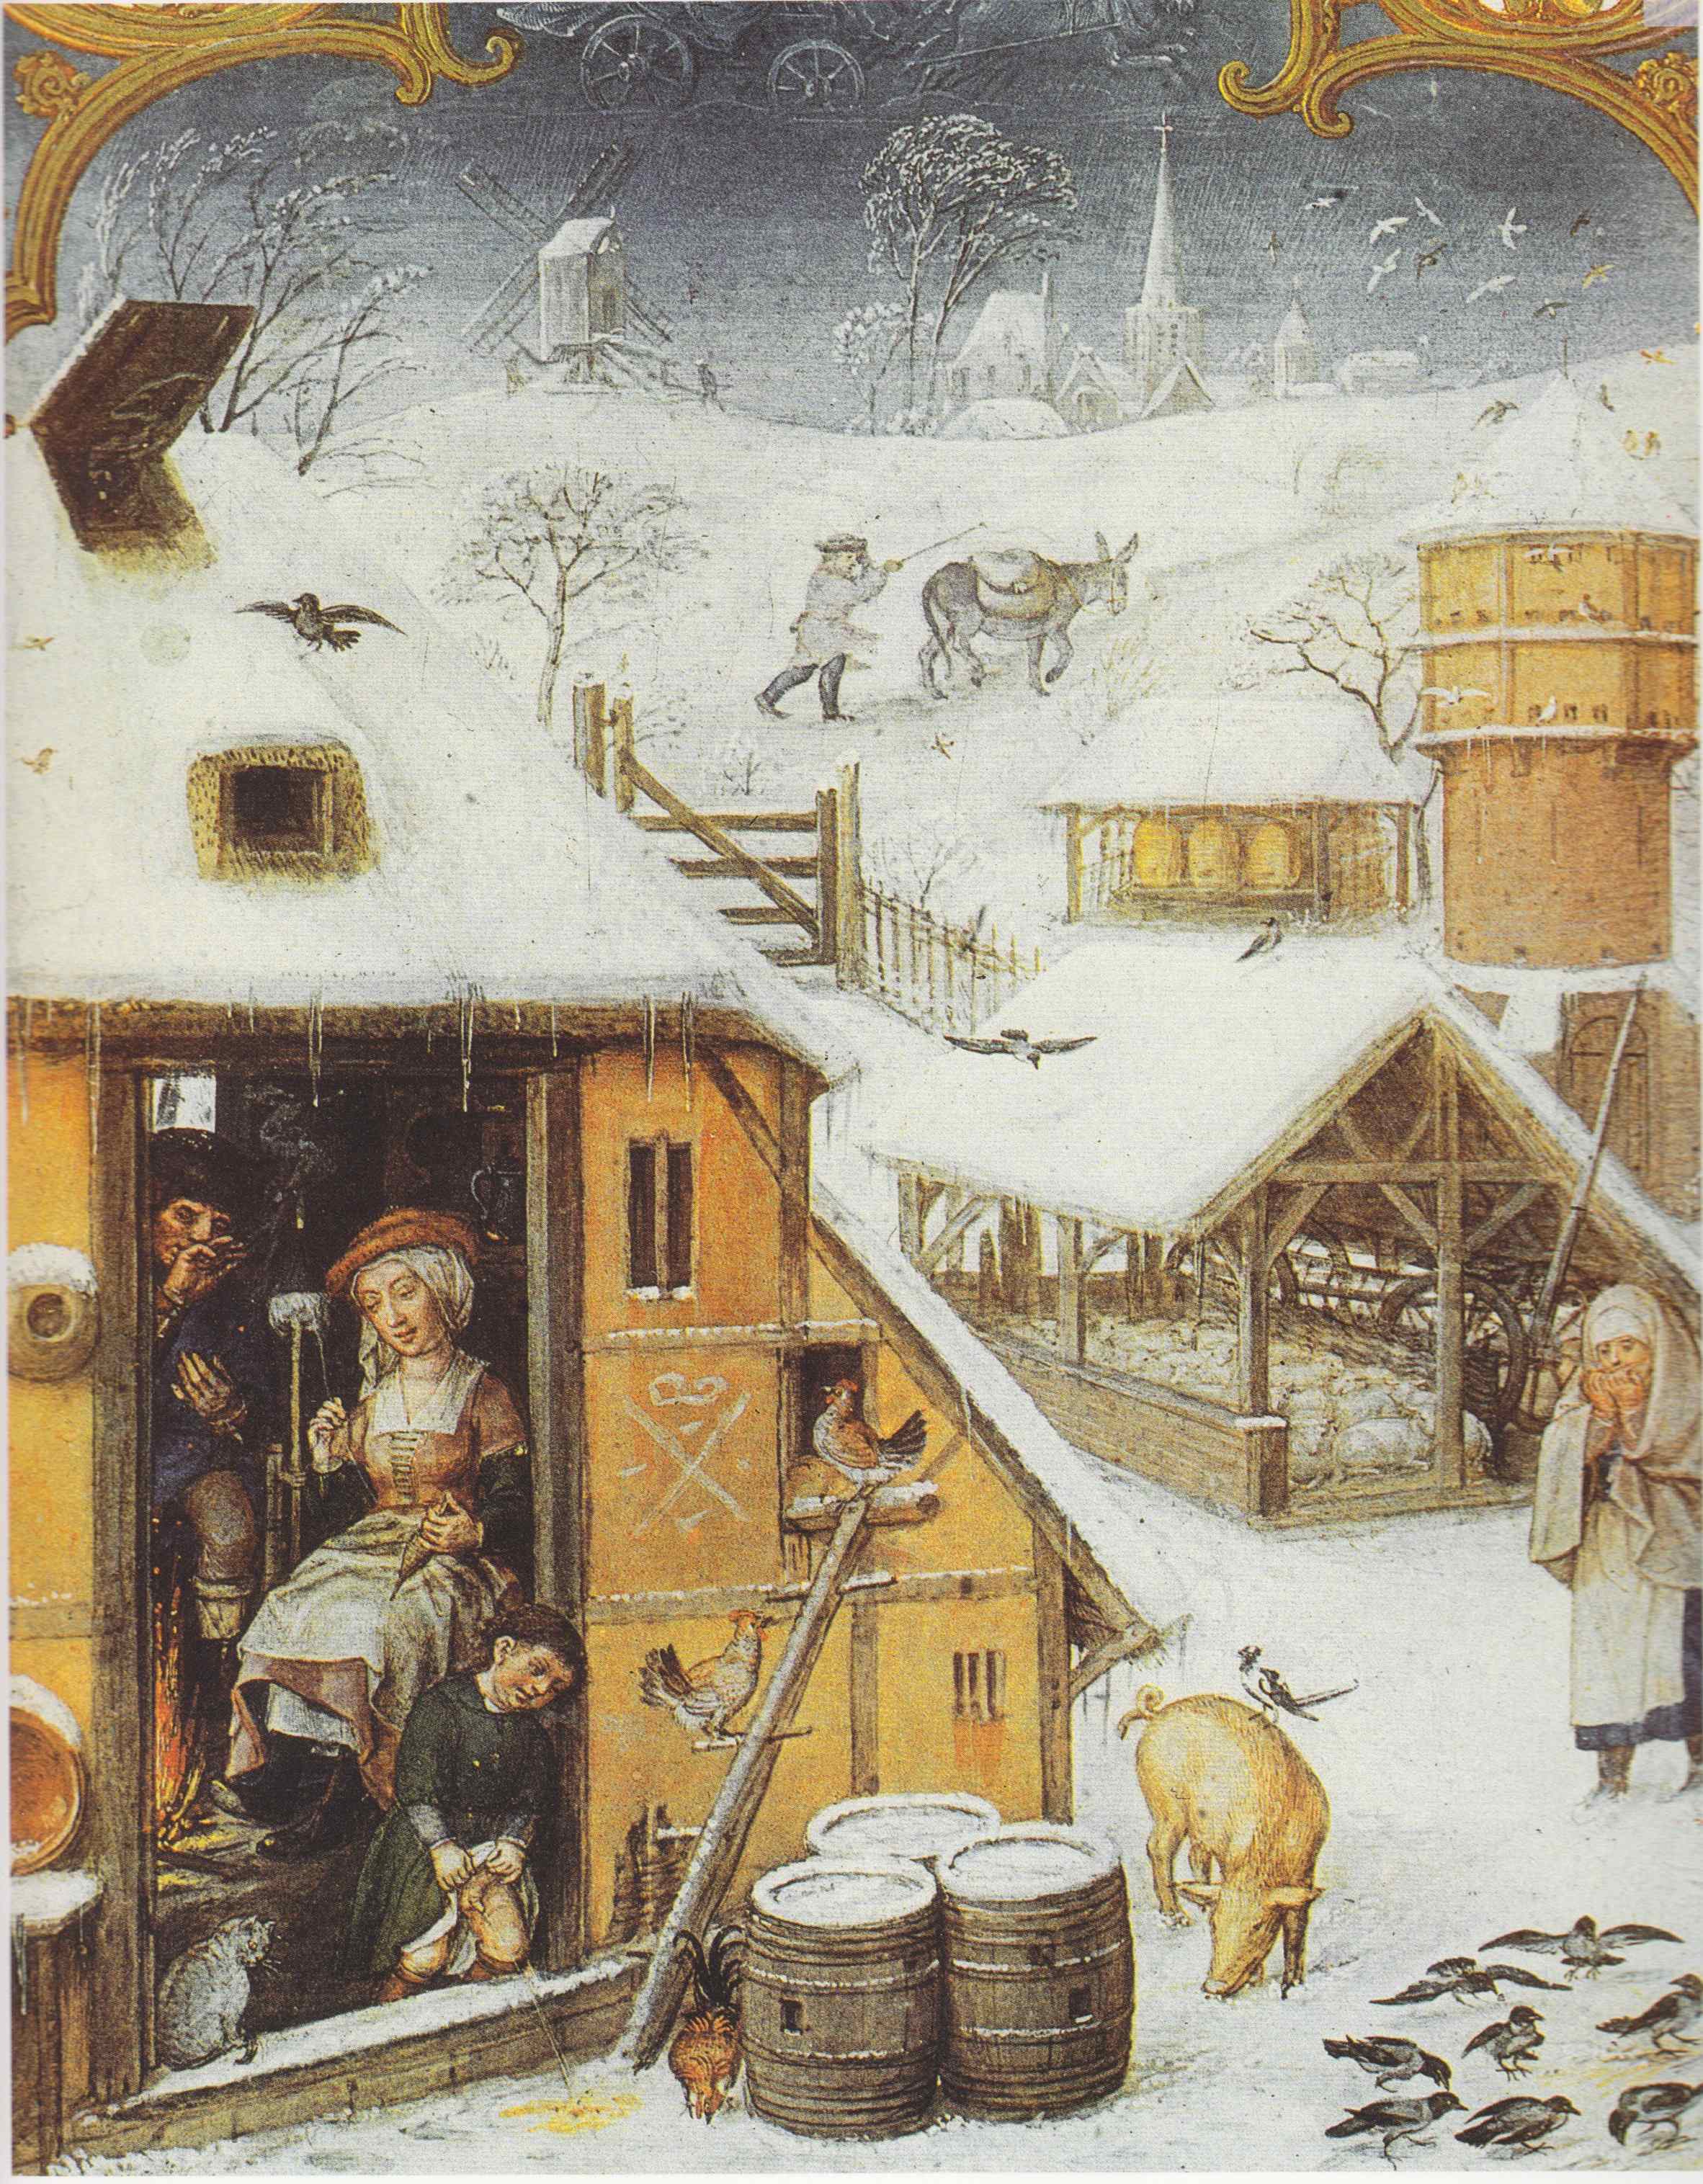
The postern windmill is counted as one of the great technological innovations of medieval times. It was mounted on a post around which the whole building could be pivoted so as to guarantee an optimal use of the prevailing wind. My model is based on a marvelous manuscript illustration I found in a book on medieval rural life, but also on pictures I found on the web, such as one from the Grand Duchy of Stollen and one on the Barbarians, Bears & Beavers blog.
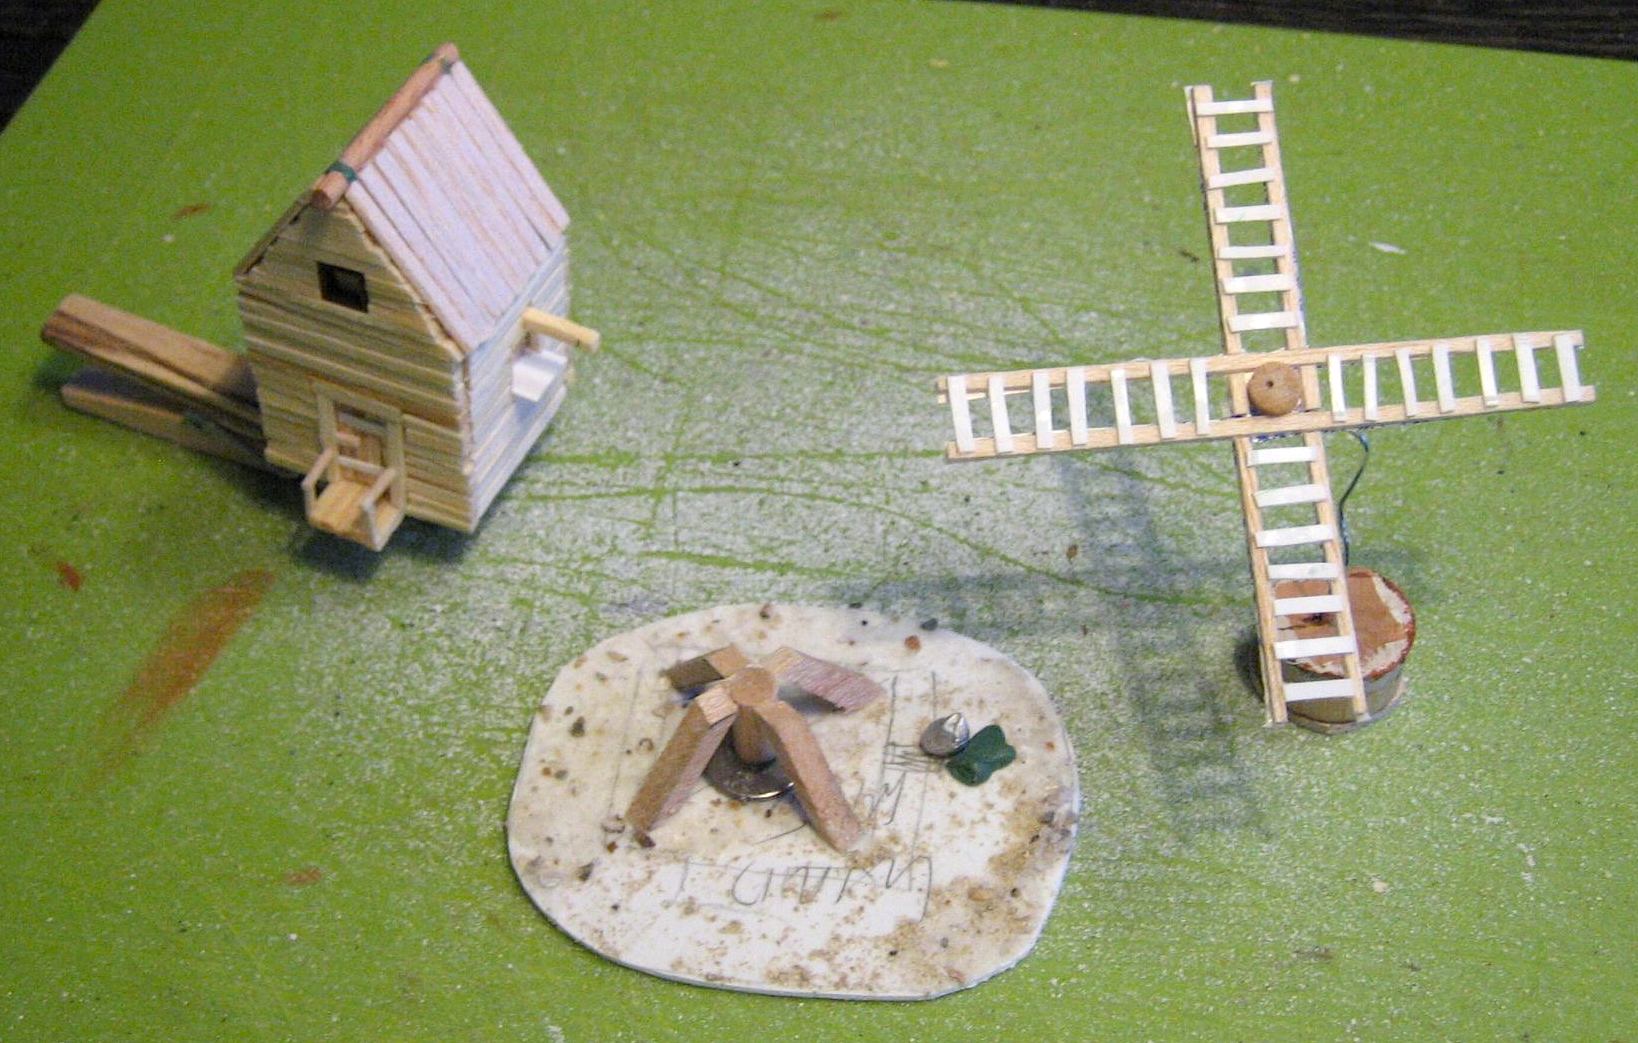
I decided to go for a simple shape and for a roof made of planks instead of a thatched roof as in the Weekley model. The core of the model was made out of thin balsa wood, with a door on the side opposite to the sails and some sort of window to haul in sacks at the side. The whole structure was then covered with small matchsticks – they may be a bit out of scale, but they provide a very nice effect of structured wood that would be quite time-consuming to achieve with plasticard. The matchsticks, especially when covered with a coat of thinned PVA glue, also give strength to the whole thing. The entrance gallery was made out of strips of balsa again. For the post, I used a wooden rod and pieces of thick balsa wood. The structure for the sail was cut out as a whole from some plastic packaging I had lying around, with tiny strips of plastic making up the lamellae. All three pieces were mounted separately for painting – I used the hole I drilled in the middle of the sail to temporarily pin it unto a piece of wire.
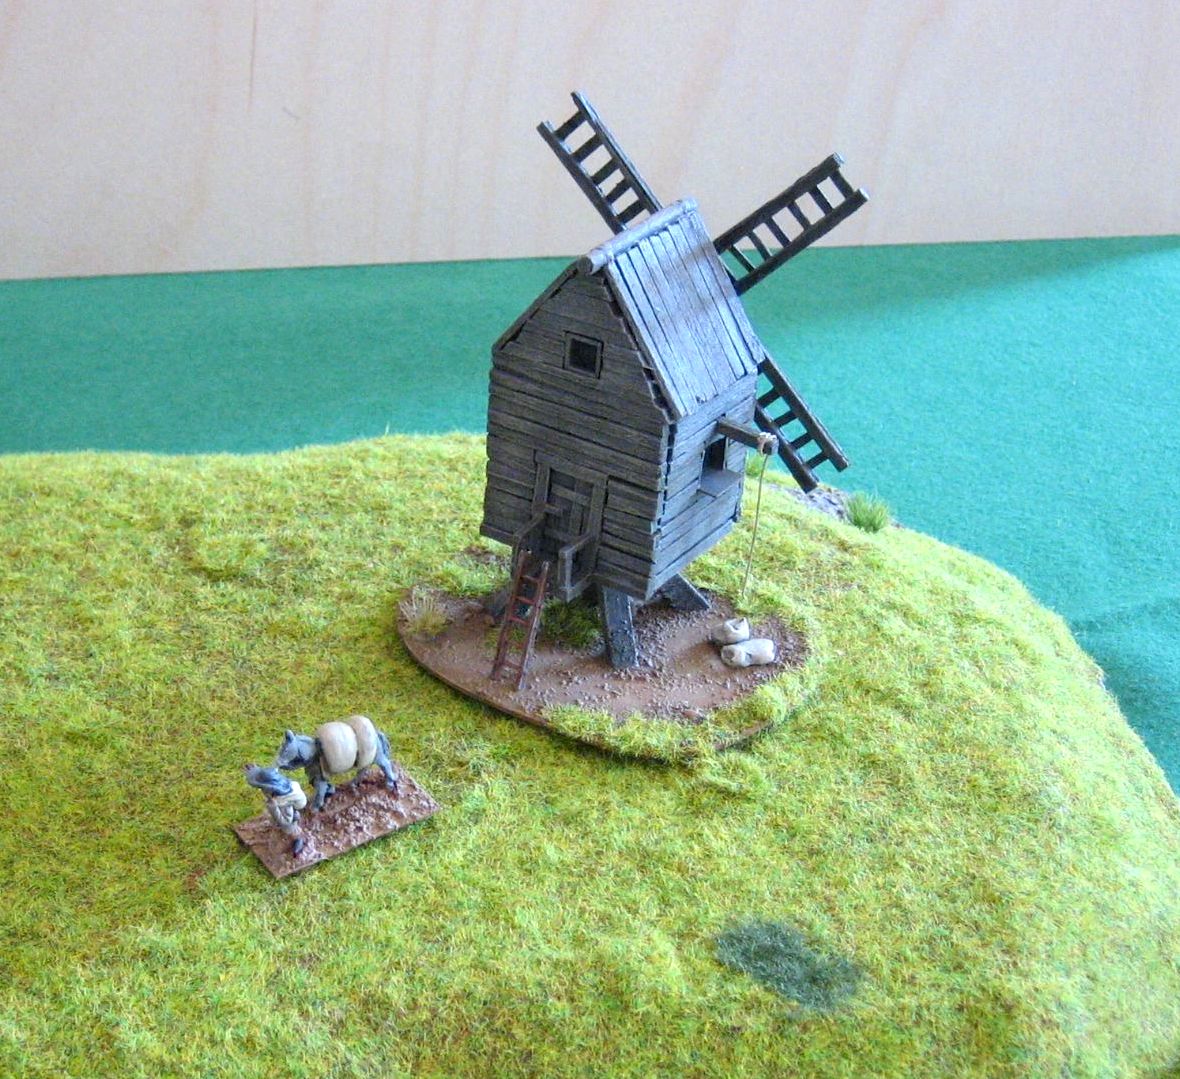
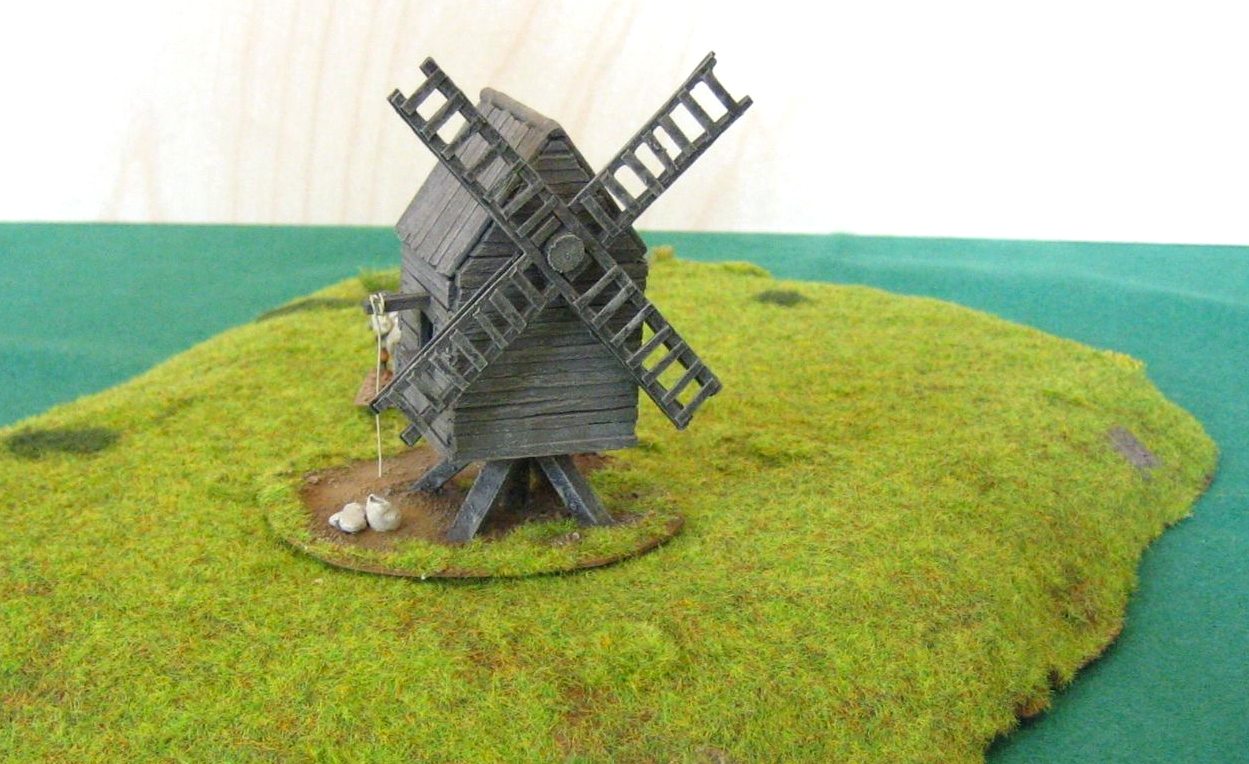
After a good undercoat of thinned PVA glue, the whole structure was painted with Stormvermin Fur, washed with black ink and drybrushed with Baneblade Brown and Vallejo Silver Grey. I applied a first coat of varnish before assembling the pieces so as to not damage anything if I should happen to be clumsy. Assembly was done by pinning, which not only gives a strong connection but also helps to align the parts.
Here are some pictures of the finished windmill together with a satisfied customer:
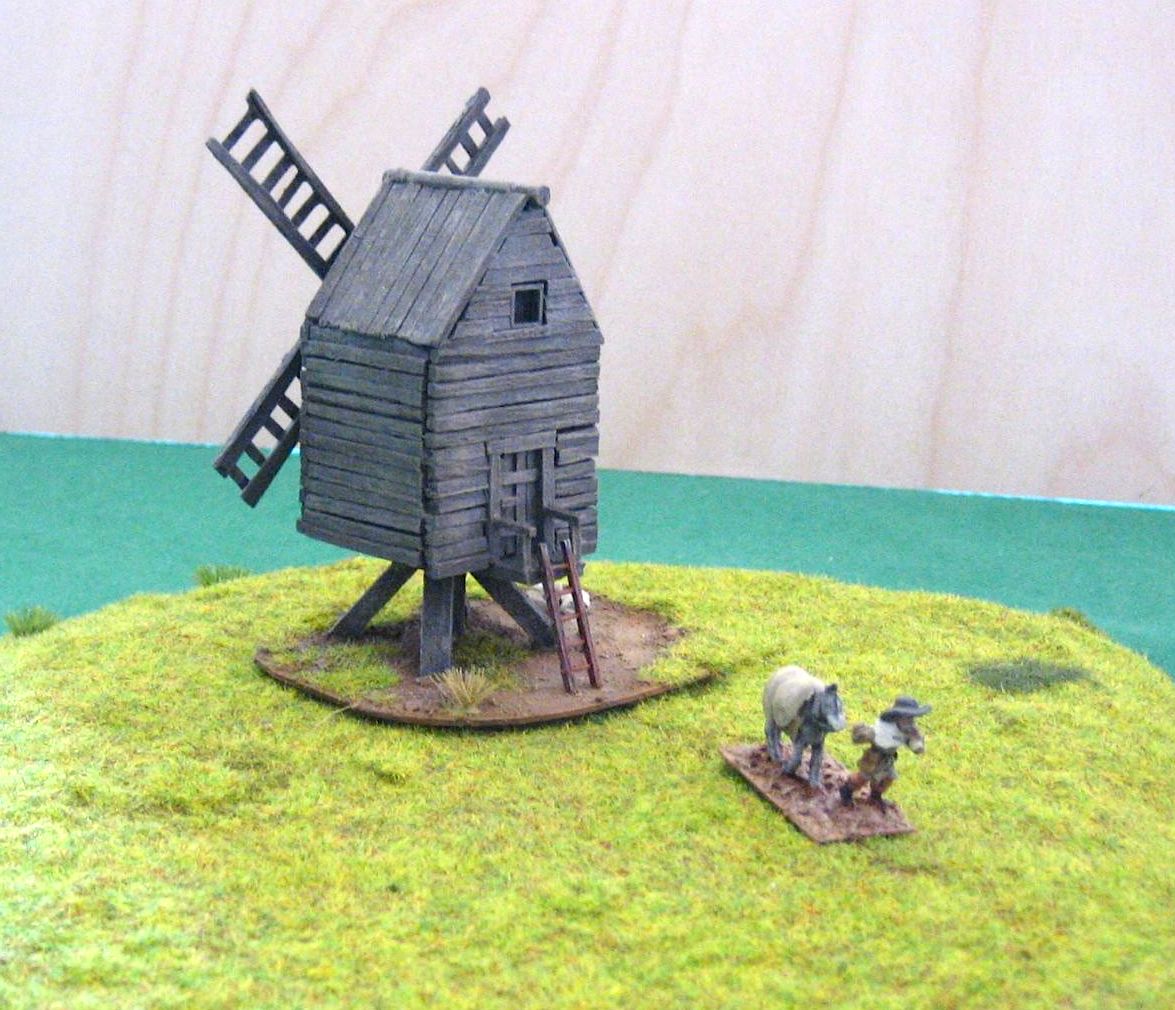
Basically the whole thing is scratchbuilt. The only ready-made parts I used were a tiny dice frame for the front window, a spare ladder and a sack from some baggage pack I had lying around. The other sack I sculpted myself with green stuff – my first success in handling that awful material!
Building the windmill has been great fun and not too much work. I am not much of a modeller and many of the things you see in magazines or on blogs can look quite intimidating. I find that 15mm is a great scale for scratch building as it is much more forgiving than 28mm – you don’t have to add as many details to make it look decent.
I am looking forward to playing our first game with the new model – I have already devised a special scenario featuring it…

That is an awesome windmill. The wood looks very convincing and the details like the sac or rope really add to the model. It is also very nice that you went for a less stereotypical windmill, but rather a rotating one. The only thing you could add is maybe a piece of cloth hanging from a window or even a miller standing in a window just to add some colour to the mills main body.
Thanks a lot! A piece of cloth hanging from the windows is a good idea… I’ll try that.